
5-minute guide to running your first test case with Testlab
So, you are new to Testlab and you want to run tests? This intro guides you to create and run your first test case.
Prerequisites:
- your own Testlab site: for example https://yourcompany.melioratestlab.com
- If you don’t have your Testlab yet, you can register for a free trial here: https://www.melioratestlab.com/sign-up
- you have an user account for Testlab
- You need also enough privileges. If you registered for a free trial yourself, you have full access.
Step 0: Create a new project ( optional )
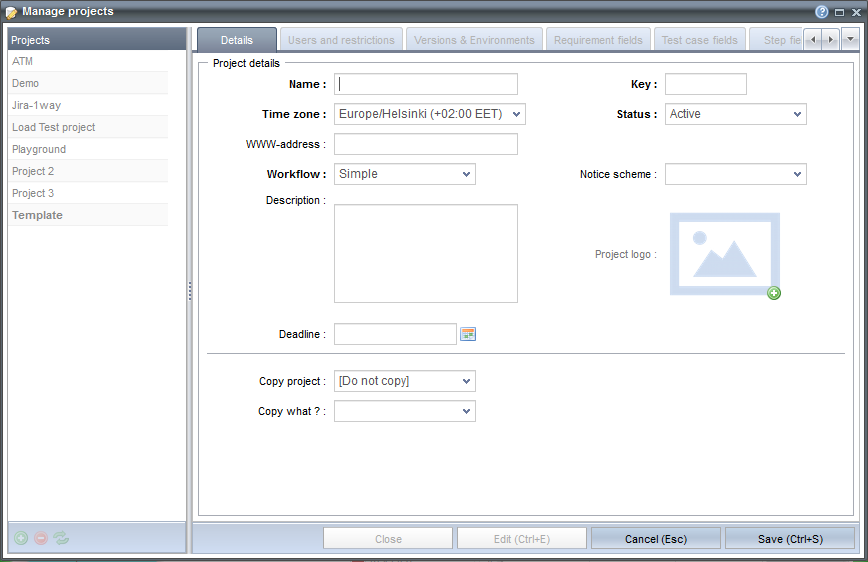
You can try out Testlab in the Demo project that comes preinstalled with Testlab. If you do this experiment in the Demo project, you can skip the copying.
- Login to your Testlab and choose Testlab –> Manage Projects…
- Click lower left-hand corner green plus-sign to create a new project.
- Fill in details: for now, choose
- name: Hello world,
- project key: HLO
- Workflow: Simple ( which is default )
- Click Save to create project and
- Choose the new project from Testlab –> Change project –> Hello world
See the online manual if you want to check details of different workflows and/or fields. You can open the help by clicking the round ? button on the top right corner of the Manage project window.
Step 1: Create a requirement
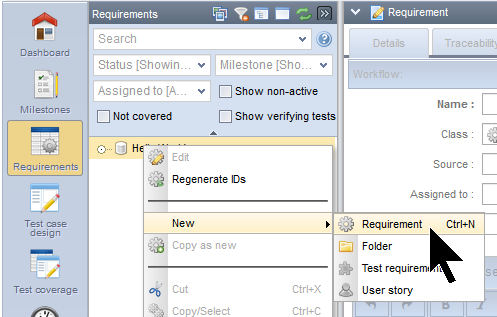
If you have user stories / requirements or other specifications available, it is often most effective to design your test case based on those. Let’s see how you can create them in Testlab.
- Click Requirements to open requirements view
- Right click over requirement tree and from context menu choose New –> Requirement…
- You can use the keyboard shortcut Ctrl+Alt+N to do the same.
- Enter requirement data:
- requirement name: World should be greeted
- description: As a world, I should be greeted.
- (optionally other attributes as you see fit)
In this case, requirement summarizes in business terms what should be achieved.
- Save the requirement by pressing shortcut key Ctrl+S or by clicking button Save.
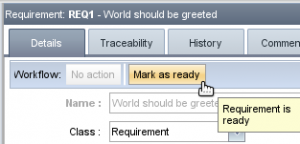
Reviewing a defined requirement is an important step and normally is made as a separate phase by a client or product owner. For now, review your requirement and when satisfied:
- mark it ready by clicking Mark as ready workflow button.
- Save the change with Ctrl + S.
Step 2: Create a test case
You want to plan *how* to test your requirement. We’ll create a test case to describe exactly how we are going to test that a requirement is filled.
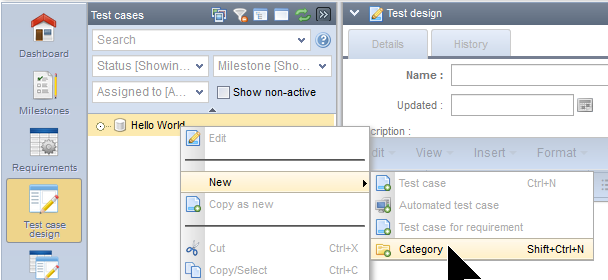 Choose view Test case design from left panel
- Choose tree node Hello World from the test case tree
- Use either right mouse button context menu or keyboard shortcut Ctrl+Shift+N to create a new test category. Enter category name: human interface
- Save the edit with Ctrl + S.
Then you are ready to create a new test case.
- Press Ctrl+Alt+N (or context menu. again) to add test case with following data:
- name: Listen up!
- Choose a tab steps.
- Add a step by clicking add step. Enter Listen carefully to a step description and You hear hello to expected result. You can easily create more test case steps by using tab-key to move to the next field in step editor.
- Now let’s mark this test case ready by going back to “Details” tab and clicking the Mark as ready -button.
- Save test case by clicking Save (Ctrl+S).
We could have created the test case straight for the selected requirement, but we wanted to show you how the test coverage view works.
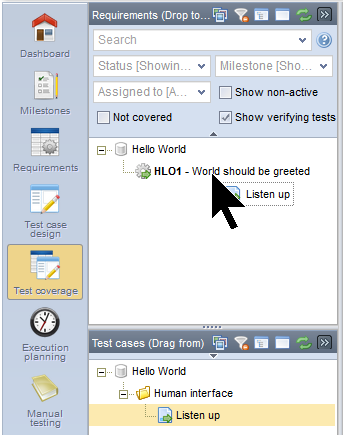
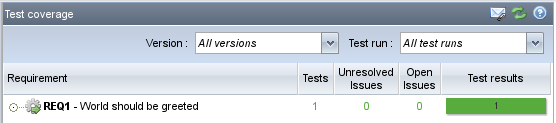
Choose view Test coverage to link your newly created test case to your requirement.- Drag the test case (lower left corner) to the requirement (upper left corner). Now test case is linked to the requirement. Basically this link means that requirement A should be tested with a test case B. Normally every requirement should have one or more test cases that *verify* that requirement is fulfilled correctly.
 Now let’s click “Recalculate” to see the change in the right side of the screen. Requirement HLO1 has now one test case (but no results yet though. We’ll get there in 30 seconds).
Step 3: Make a test run
You could make reusable test sets and then test runs from those sets. Now we, however, want to get straight to the business and create a test run directly.
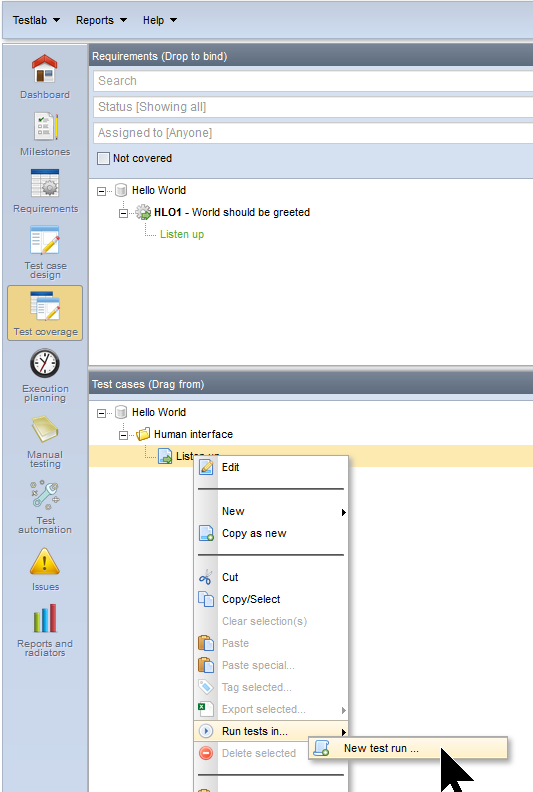
- Over test case tree ( bottom here on Test coverage view ), and there over a test case, open context menu with a right mouse button.
- From opened menu choose Run tests in… –> New test run…
This will open a pop-up window and create a test run with all checked test cases so that they can be executed. Enter a test run name: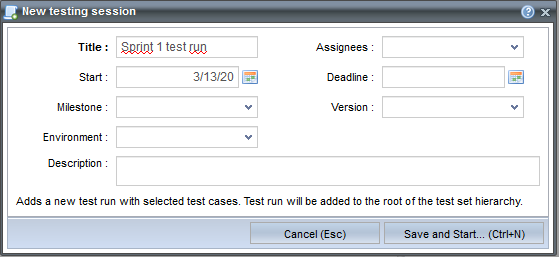
- Title: Sprint 1 run
and click Save and start.
You could have entered also some other relevant data like the expected completion date for this test run if you were planning the testing rounds well in advance. Telling Testlab what version is being tested will also help in larger projects to see the big picture.
Step 4: Run test(s)
If we would have created test runs earlier we would go to manual testing view and pick a test run to start the execution. Now we started the execution right away so we can give test case a result.
Now we have a test execution window open. Each test case data will be presented to you: after clicking through test case step you have to choose either
- Pass (test case executed successfully) or
- Fail (test case did not run successfully)
for test case result. Other (normally more rare) options would be
- Blocked (test case cannot be run at the moment) or
- Skip (skip running of a test case: there is no result recorded for this test case)
If there were a problem with a test case execution and expected result was not achieved, it would be a good practice to *always* add an issue by clicking a button Add issue…
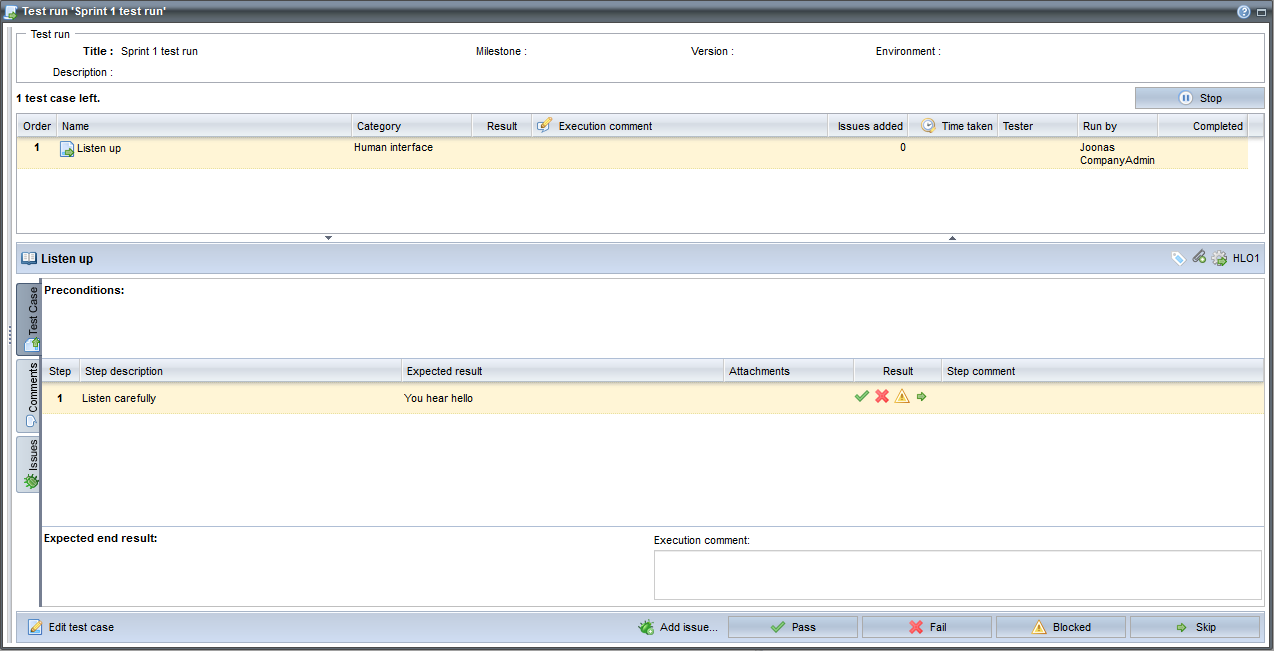 For now, just press Pass to record a successful result for your test case.
Voilà, you have completed your first test run and recorded the results to Testlab!
Bonus step (4+1)
To see where your project stands in regards to testing progress, choose again view Test coverage. Right-hand side will show you the project testing status in relation to the project requirements. You should see that your single business requirement is well covered and passed all tests (=Green!).
Happy testing 🙂